Guidance on how to Hydrostatic Test and a sample procedure.
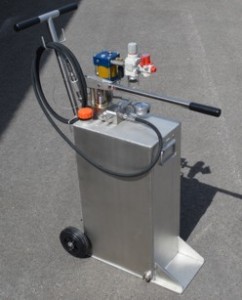
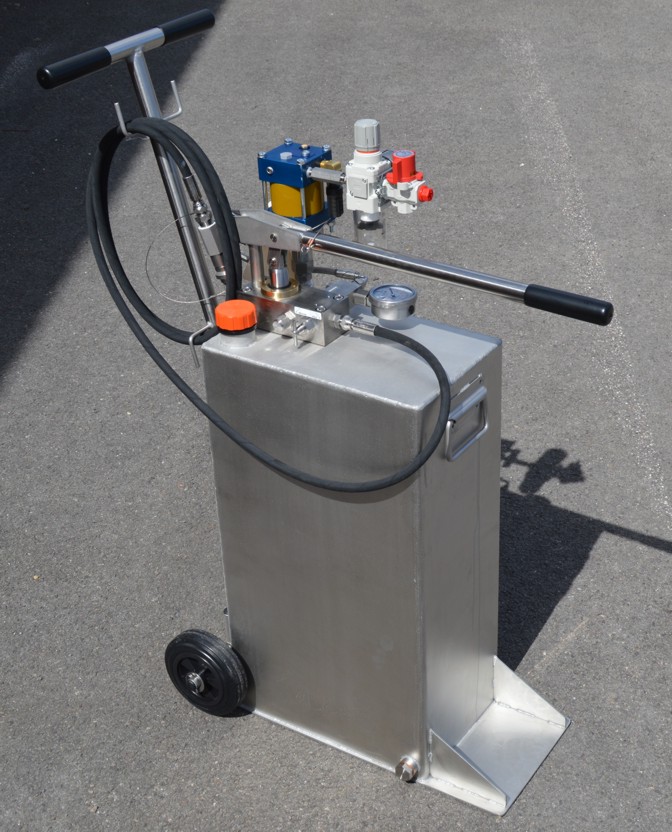
A Micropac “Duo” combination Air Driven and Manual hydrostatic pressure test pump unit is a very neat solution. The 50 litre 316 trolley unit shown here is used continually in a petrochemical plant.
Firstly, a hydrostatic test is the same as a hydrostatic pressure test or just a pressure test. Different people use different terms.
Carry out a Risk Assessment for what you are pressure testing. See our document 007065000 for a sample of a Risk Assessment for Pressure Testing for guidance only. Safety is paramount. Every application is slightly different, so the Risk Assessment for Pressure Testing must reflect your own method of use and working environment.
Our pump unit equipment complies with the requirements of the EU Pressure Equipment Directive (PED). When you add your hose and test piece, the whole system must also comply with the EU Pressure Equipment Directive. In the EU, there is a need to assess the pressure, system volume and the inherent safety of the test fluid to indicate whether you are within the area of “Sound Engineering Practice.” This will form part of your Risk Assessment for Pressure Testing. It is a useful analysis wherever you are in the world. Clearly testing a large volume at very high pressure with a test fluid having a low ignition temperature has high risk.
What is important as we see it? These are a few considerations:
Have you a plan of what you are doing? We wouldn’t just write “Tested” and have a sign off. A Quality person will see this a totally meaningless and immediately ask how, when and what were the acceptance criteria?
Have you a customer drawing, a customer specification, a Factory Acceptance Test (FAT) setting out acceptance criteria or do you need to write a test procedure? For example, a hydrostatic pressure testing requirement could be as simple as follows. “Pressurise a system or component to 200 bar for five minutes using water with a maximum permitted pressure drop of 5 bar and no leakage or permanent deformation evident.”
Fill your test pump with clean fluid through the filler cap. Don’t mix fluids. Use the correct fluid and ensure that any fluid already in the reservoir is clean and has not degraded with moisture or broken down chemically.
If you are using a calibrated pressure gauge, check that it is still within its calibration period. Even a gauge treated as an “indicator” must be on zero. A pressure gauge that is not calibrated may be acceptable for indication only but is not of much use as part of a quality system.
We suggest using a -4 size hose typically terminating in a G1/4 female swivel fitting or similar. This makes connections very easy. The flow rates are small, so having a large bore hose is pointless. However, we do always suggest having a hose, connection block or some volume in the system. For example, screwing a part for testing like a pressure switch directly into the pump and having a minute system volume can make the unit awkward to use. A hose provides some volume.
Make sure the working pressure of the hose is more than your test pressure then inspect the hose and fittings for damage. Don’t use a damaged hose or fittings.
Let’s add some detail to what might appear in your test procedure. Here is a sample hydrostatic test procedure for guidance in doing your own document.
Fill the reservoir using the G1 ¼ threaded filler cap. This always breathes to atmosphere. Never blank this filler port. Put enough fluid in the reservoir. If you run out of fluid during testing, you will have to release the pressure, add more fluid to the reservoir, bleed some fluid through the test pump then start your test again.
Connect the pump to your test piece using a flexible hose and the correct fittings.
Pump a few strokes of the test pump with the hold/release valve open to bleed air out of the pump. You will hear fluid drain straight back into the reservoir. Then close the hold/release valve. Don’t over tighten the hold/release valve.
Pump the pump to fill your test piece, ensuring there is a vent to let the air out at the highest point. When bubbles stop, close the vent.
Pressurise the pump, watching the pressure gauge as it rises up to your test pressure. Look for any weeps or leaks from fittings.
Hold the pressure for however long and record the leakage, deciding whether this is acceptable. Note that hoses may expand slightly under pressure, so you may top the pressure up and start the test from that point. Record the results.
Release the pressure by opening the hold/release valve on the side of the pump. You may open the air vent on the system or component being tested, open the hold release valve on the hand pump and let the fluid drain back into the pump reservoir.
Disconnect the hose from your test unit. Be aware of the environment and don’t spill the test fluid.
Document hydrostatic test procedure sample issue 1 for guidance only. Every application is different, so you will need your own procedure.
You may also be interested in;
Our ten tips to make a hydrostatic pressure test easy. What we have learnt over 35 years.
Sample of Risk Assessment for Pressure Testing. Essential if you are working under pressure.
Our YouTube video “how to burst test” shows a Micropac pump used for a simple but safe burst test.
How to sell this product in the country of Vietnam
Vantoi, Many thanks. We ship direct around the world, so send any enquiries over to pumpsales@sarum-hydraulics.co.uk. We have one specialist distributor for Pressurised Sealing systems/API. Regards.